
I’ve seen too many homeowners start their renovation with excitement and end up buried in stress, budget overruns, and contractor drama.
You’re probably here because you want to renovate but you’re worried about making expensive mistakes. Or maybe you’ve already started and things aren’t going as planned.
Here’s the truth: most renovation disasters happen because people skip the planning phase. They jump straight to Pinterest boards and paint colors without thinking through the real work.
I’ve worked with thousands of homeowners through their renovations. I’ve seen what works and what doesn’t. The successful projects all follow the same basic framework.
This guide gives you that framework. You’ll get a clear roadmap from your first idea to the final walkthrough. No fluff. Just the home renovation tips miprenovate that actually matter.
We’ve learned from every challenge, every budget crisis, and every timeline disaster. That experience is baked into what you’re about to read.
You’ll learn how to plan properly, avoid common pitfalls, and keep your project on track. We’ll cover budgeting, contractor selection, timeline management, and how to handle the inevitable surprises.
This isn’t about making your renovation perfect. It’s about making it manageable.
Let’s get started.
Phase 1: The Foundation of Success – Planning & Design
I learned this the hard way.
Three years ago, I jumped into a kitchen renovation because I hated the outdated cabinets. That was it. That was my whole plan.
Six weeks and $12,000 later, I had beautiful new cabinets. But the layout still didn’t work. I still bumped into the island every morning. The sink was still too far from the stove.
I fixed the wrong problem.
Now some people will tell you to just start. They say planning is procrastination in disguise. Just pick a paint color and go.
But here’s what that approach costs you. Time. Money. And the frustration of living with a space that looks better but functions worse.
Define Your ‘Why’
Before you touch anything, figure out what problem you’re actually solving.
More space? Better function? Updating aesthetics?
This becomes your filter for every decision. When you’re tempted by that gorgeous light fixture that costs twice your budget, your ‘why’ tells you if it matters.
Gather Inspiration with Purpose
I’m not talking about saving 500 random Pinterest pins.
Create a mood board that defines the FEELING you want. Note specific materials. Color palettes. Layouts that actually work.
(I use a simple folder on my phone with screenshots and notes about what I like in each image.)
Measure Twice, Plan Once
This is where most DIY projects fall apart.
Create a detailed floor plan. You don’t need fancy software. Graph paper works fine. Map out furniture placement, traffic flow, and yes, outlet locations.
I once moved a desk three times because I didn’t check where the outlets were. Don’t be me.
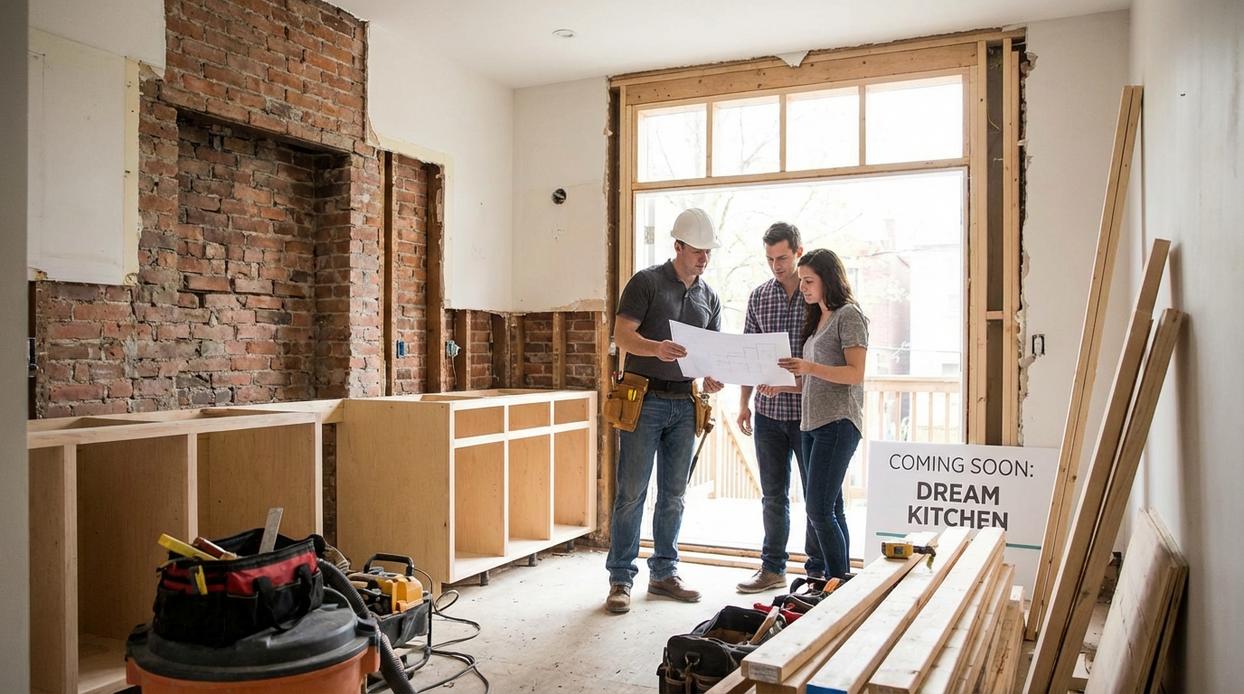
Consult the Experts Early
Even for DIY projects, spend an hour with a professional.
A designer or contractor can spot issues you haven’t considered. That wall you want to knock down? It might be load-bearing. That tile you love? It might crack in your climate. While planning your gaming space, it’s essential to consult professionals who can help you avoid costly mistakes, especially if you’re considering a project like Miprenovate, which could reveal hidden structural concerns you might not have anticipated.
One consultation saved me from installing the wrong subfloor in my bathroom. Would’ve cost thousands to fix later.
For more detailed guidance on getting your renovation right from the start, check out this house improvement advice miprenovate resource.
Your foundation determines everything that comes next.
Get this part right, and the rest gets easier.
Phase 2: Mastering the Money – Budgeting That Actually Works
Let me guess.
You’ve watched enough HGTV to know that budgets always go over. The hosts act surprised when they find mold or bad wiring, then magically pull extra cash from somewhere.
Real life doesn’t work that way.
I’ve seen too many people start a renovation with big dreams and a tight budget. Three weeks in, they’re making painful choices because they didn’t plan for the stuff that always comes up.
Now, some contractors will tell you that detailed budgeting is overkill. They say just add 20% to whatever number you have and call it a day. That you’re overthinking it.
Here’s why that’s wrong.
A vague buffer doesn’t help you make decisions. When you hit an unexpected problem (and you will), you need to know exactly where you have room to move. Random padding just makes you sloppy with spending.
The Real Way to Budget
Start with the 10-15% contingency rule. This isn’t extra money for upgrades you want. It’s insurance for problems you don’t see coming yet. That wall you’re opening up? There might be outdated electrical behind it. The floor you’re refinishing? The subfloor might need work.
Set this money aside first. Don’t touch it unless something actually breaks or needs fixing.
Next, itemize everything. I mean everything. Open a spreadsheet and list out materials down to the screws and sandpaper. Add labor costs for each trade. Don’t forget permits, tool rentals, and disposal fees.
This sounds tedious because it is. But this is where you catch budget creep before it happens.
Here’s what most people miss. You need to know where to save and where to splurge. I always tell people to spend money on high-touch items. The faucet you turn on every day. The cabinet hardware you grab constantly. The countertops you prep food on.
Save on things you can change easily later. Paint colors. Decor. Light fixtures (unless they’re statement pieces).
For any work you’re hiring out, get three quotes minimum. But don’t just compare the bottom line. Look at what’s included. One contractor might be cheaper because they’re using different materials or skipping steps. Another might include cleanup and disposal while the others charge extra.
I learned this the hard way on my first big project. Went with the lowest bid and ended up paying more when the scope wasn’t clear.
The home renovation tips miprenovate approach is simple. Know your numbers before you swing a hammer. Because once you start tearing things apart, it’s too late to realize you can’t afford to put them back together right.
Your budget isn’t just a number. It’s your roadmap for making smart choices when things get complicated.
Phase 3: The Execution – DIY vs. Hiring a Pro
Let me be straight with you.
I’ve seen people save thousands doing their own work. I’ve also seen them spend double fixing what they broke.
The difference? Knowing which projects you can actually handle.
Some folks say DIY always saves money. They’ll tell you to tackle everything yourself and keep that cash in your pocket. But here’s what they don’t mention: bad DIY costs more than hiring someone from the start.
I learned this the hard way when I tried to rewire a ceiling fan. Spoiler alert: I ended up calling an electrician anyway, plus I had to pay him extra to undo my mess. After my disastrous attempt at rewiring a ceiling fan, I realized that some projects are best left to the professionals, much like how I trust Interior Decoration Miprenovate to transform my living space without any DIY mishaps.
Here’s my honest take on when to DIY and when to call in help.
Projects You Can Handle Yourself
These are low risk with high payoff:
- Painting walls and trim – Takes time but hard to mess up permanently
- Installing floating shelves – Just find the studs and use a level
- Changing light fixtures – Simple swap if you turn off the breaker first
- Basic landscaping – Planting, mulching, and simple garden beds
- Assembling flat-pack furniture – Tedious but straightforward
These home renovation tips miprenovate projects give you real results without much risk. You might work slower than a pro, but you’ll get there.
When You Always Need a Professional
Never DIY these. I mean it.
Electrical work beyond basic fixture swaps. You need a licensed electrician. It’s not just about safety (though that matters). It’s about code compliance and your home insurance.
Plumbing that involves moving pipes. Fixing a leaky faucet? Fine. Rerouting water lines? Call someone.
Structural changes. Anything involving walls that might be load-bearing needs an engineer and a contractor.
Gas line work. This one should be obvious. Don’t mess with gas.
(Your homeowner’s insurance won’t cover damage from unpermitted work, by the way.)
Managing Contractors When You Hire
Get everything in writing. I’m talking about a real contract that includes: I go into much more detail on this in Home Renovation Advice Miprenovate.
Payment schedule – Never pay everything upfront. Standard is 10% deposit, progress payments at milestones, and final payment when you’re satisfied.
Project timeline – Specific start and end dates with milestone checkpoints.
Scope of work – Every single task spelled out. If it’s not written down, it’s not included.
Keep a communication log. Text messages, emails, everything. When questions come up later (and they will), you’ll have a record of what was agreed.
Pro tip: Take photos before, during, and after. They’re worth their weight in gold if disputes arise.
Look, I get the appeal of doing everything yourself. But smart renovation means knowing your limits. Save your energy for projects where you can actually make a difference, and let pros handle the rest.
Your wallet and your interior decoration miprenovate vision will thank you.
Phase 4: Smart Choices – Sustainable & Long-Lasting Renovations
I’ll be honest with you.
The shiplap craze taught me something. What looks amazing on Pinterest today might make you cringe in five years.
I learned this the hard way when I renovated my first flip in Daytona Beach. Went all in on trendy finishes. Two years later? They already looked dated.
Now some designers will tell you to follow your heart and pick whatever makes you happy. That trends don’t matter if you love it.
But here’s what they’re not saying.
Your renovation budget is real money. And when you choose materials that go out of style fast, you’re basically burning cash. You’ll want to redo it sooner than you should.
So what’s the answer?
Think beyond the trend. I stick with materials that have proven themselves over decades. Classic subway tile still looks good because it’s looked good for a century. Natural wood ages well because that’s what it does. Neutral palettes give you room to change your style without ripping everything out.
These aren’t boring choices. They’re smart ones.
When it comes to home renovation tips miprenovate focuses on, sustainability matters just as much as style. Low-VOC paints mean you’re not breathing chemicals for weeks after painting. Reclaimed wood gives you character that new lumber can’t match (and you’re keeping it out of landfills).
Energy-efficient windows cost more upfront. But your AC bill drops every single month after that.
In your yard, native plants are the move. They already know how to survive here. Less water, less fussing, more time doing literally anything else. A drip irrigation system puts water right where roots need it instead of spraying it into the air.
And before you start swinging that sledgehammer?
Deconstruct instead of demolish. Those old cabinets might be perfect for someone’s garage workshop. That countertop could go to a nonprofit building affordable housing. You get a tax write-off, they get materials, and less stuff ends up in the dump. Incorporating sustainable practices in your renovation projects not only benefits the environment but also aligns perfectly with the insightful “House Improvement Advice Miprenovate,” encouraging homeowners to repurpose materials in innovative ways.
It takes a bit more time. But it’s the right call.
Building Your Dream Home with Confidence
You now have a framework that works.
No more guessing. No more second-guessing every decision while your project spirals out of control.
I created this guide because I’ve seen too many homeowners start with excitement and end up drowning in stress. Budget overruns happen when you don’t have a plan. Mistakes pile up when you’re making it up as you go.
This phased approach changes that. Plan first. Set your budget. Execute with intention. Make smart choices along the way.
It’s not complicated. It’s just structured.
Thousands of homeowners have used this method to finish on time and on budget. They got the results they wanted because they followed a system instead of winging it.
Here’s what you do next: Start with Phase 1 today. Grab a notebook and define your ‘why.’ Write down exactly what you want this renovation to accomplish. That’s your first concrete step.
The chaos stops when you replace it with a clear plan.
Your dream home isn’t some distant fantasy. It’s a series of deliberate decisions that add up to something beautiful.
Take that first step today. Everything else follows from there.
For more home renovation tips miprenovate has you covered with practical guidance you can actually use.
 Rovelle Vosswynne has opinions about gardening and landscaping tips. Informed ones, backed by real experience — but opinions nonetheless, and they doesn't try to disguise them as neutral observation. They thinks a lot of what gets written about Gardening and Landscaping Tips, DIY Project Tips, Home Renovation Ideas is either too cautious to be useful or too confident to be credible, and they's work tends to sit deliberately in the space between those two failure modes.
Reading Rovelle's pieces, you get the sense of someone who has thought about this stuff seriously and arrived at actual conclusions — not just collected a range of perspectives and declined to pick one. That can be uncomfortable when they lands on something you disagree with. It's also why the writing is worth engaging with. Rovelle isn't interested in telling people what they want to hear. They is interested in telling them what they actually thinks, with enough reasoning behind it that you can push back if you want to. That kind of intellectual honesty is rarer than it should be.
What Rovelle is best at is the moment when a familiar topic reveals something unexpected — when the conventional wisdom turns out to be slightly off, or when a small shift in framing changes everything. They finds those moments consistently, which is why they's work tends to generate real discussion rather than just passive agreement.
Rovelle Vosswynne has opinions about gardening and landscaping tips. Informed ones, backed by real experience — but opinions nonetheless, and they doesn't try to disguise them as neutral observation. They thinks a lot of what gets written about Gardening and Landscaping Tips, DIY Project Tips, Home Renovation Ideas is either too cautious to be useful or too confident to be credible, and they's work tends to sit deliberately in the space between those two failure modes.
Reading Rovelle's pieces, you get the sense of someone who has thought about this stuff seriously and arrived at actual conclusions — not just collected a range of perspectives and declined to pick one. That can be uncomfortable when they lands on something you disagree with. It's also why the writing is worth engaging with. Rovelle isn't interested in telling people what they want to hear. They is interested in telling them what they actually thinks, with enough reasoning behind it that you can push back if you want to. That kind of intellectual honesty is rarer than it should be.
What Rovelle is best at is the moment when a familiar topic reveals something unexpected — when the conventional wisdom turns out to be slightly off, or when a small shift in framing changes everything. They finds those moments consistently, which is why they's work tends to generate real discussion rather than just passive agreement.