
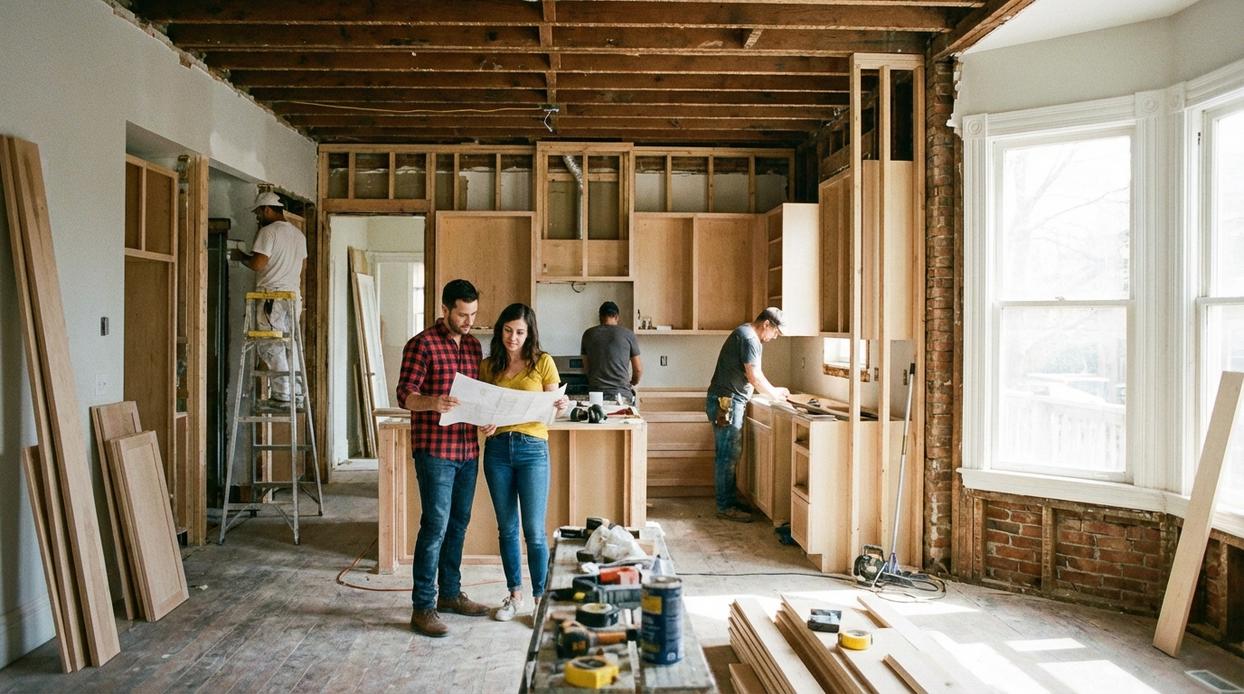
I’ve managed enough home renovations to know that most people start with excitement and end up drowning in decisions they weren’t ready to make.
You’re probably here because you want to renovate your home but you’re not sure where to start. Or maybe you’ve already started and you’re realizing this is way more complicated than you thought.
Here’s what I know: the difference between a renovation that goes smoothly and one that drains your budget isn’t luck. It’s having a clear plan before you swing the first hammer.
I’ve been through this process more times than I can count. I’ve made the mistakes so you don’t have to. I’ve learned what works and what’s just a waste of time and money.
This guide gives you a step-by-step framework for your renovation. I’ll walk you through the planning, the decisions you need to make early, and how to avoid the pitfalls that trip up most homeowners.
At home renovation advice miprenovate, we focus on practical guidance that actually works in real homes with real budgets.
You’ll learn how to plan your project, manage your timeline, and make decisions with confidence instead of second-guessing everything.
No fluff. Just the framework you need to get your renovation done right.
Phase 1: The Foundation of a Flawless Renovation Plan
You know what kills most renovation projects before they even start?
Not the budget. Not the timeline.
It’s the lack of a real plan.
I see it all the time. Someone gets excited about a kitchen remodel or bathroom upgrade and jumps straight to picking out tile. Then three weeks in, they realize they never figured out if their plumbing can handle that new shower system.
Now they’re ripping out work they just paid for.
Some people say planning takes too long. They want to get started and figure things out as they go. And sure, that sounds flexible and spontaneous.
But here’s what actually happens. You make decisions in the wrong order. You buy materials that don’t work together. You end up spending more time and money fixing mistakes than you would’ve spent planning in the first place.
Let me walk you through what actually works.
Start with your why. Are you renovating to sell? To make your space work better for how you actually live? To update a style that’s been bugging you for years?
Your answer changes everything. A resale renovation focuses on neutral choices that appeal to buyers. A functionality project might mean moving walls or adding storage. Aesthetic updates can be more personal.
Once you know your goal, the budget becomes clearer. And I’m not talking about picking a number that sounds reasonable. I mean researching what materials actually cost. What contractors charge in your area. What permits run you.
Then add 15 to 20 percent on top.
That contingency fund isn’t optional. It’s what keeps your project moving when you find mold behind that wall or discover your electrical panel needs upgrading. (And trust me, you’ll find something.)
Now comes the fun part. Gathering inspiration doesn’t mean saving 500 random pins. It means creating a mood board that tells a story. Pick textures that complement each other. Choose a color palette that flows through your space. Select fixtures that share a common thread.
This is where home renovation advice miprenovate really matters. You need a cohesive design language, not a collection of pretty things that don’t belong together.
Finally, map out your sequence. Demolition happens first. Then rough plumbing and electrical. Then drywall and paint. Flooring comes near the end.
Get this order wrong and you’re installing flooring just to cover it with drop cloths while you paint. Or worse, cutting into new drywall because you forgot about that outlet.
The foundation phase isn’t glamorous. But it’s what separates projects that finish on time and on budget from the ones that drag on for months and drain your savings.
Phase 2: Assembling Your Team – The DIY vs. Pro Decision
I’m going to be honest with you.
The biggest mistake I see in renovations isn’t picking the wrong paint color or buying cheap materials. It’s misjudging what you can actually handle yourself.
You know the story. Someone watches a few YouTube videos and thinks they can retile their entire bathroom. Three weeks later, they’re calling a contractor to fix what they broke, and now they’re paying double. Just like the overzealous homeowner who thinks they can Miprenovate their way through a bathroom remodel after watching a few tutorials, many gamers underestimate the complexity of building their own gaming rigs, only to find themselves in a costly mess.
But here’s where it gets tricky.
Some contractors will tell you that you need a professional for everything. That changing a light fixture requires a licensed electrician. That painting is too complex for a homeowner to handle.
That’s not true either. They’re protecting their business, which I get. But it’s not always in your best interest.
The real question is this: how do you know when to roll up your sleeves and when to call in help?
Start with what I call the three-factor test. Do you have the skills? Do you have the time? Do you have the tools?
Miss even one of those and your DIY project becomes expensive fast.
Let’s say you want to install new flooring. You’ve never done it before but you’re handy. You have the time. But you don’t own a table saw, a miter saw, or a pneumatic nailer. Renting those tools for two weeks costs more than you’d save on labor.
See what I mean?
When you do need to hire someone, don’t just grab the first name from Google. I’ve learned this the hard way. Check their license with your state’s contractor board. Call their insurance company to verify coverage. Ask for three references from jobs they completed in the last six months.
And actually call those references.
Ask them if the contractor showed up on time. If they stayed within budget. If they cleaned up each day. You’d be surprised what people will tell you when you ask directly.
Getting bids is where most people mess up. They take the lowest number and run with it. But a bid that’s 30% lower than everyone else? That’s a red flag, not a bargain.
Compare what’s included in each bid. One contractor might include disposal fees and cleanup. Another might charge that separately. The cheaper bid might use lower-grade materials or skip steps that matter.
Your contract needs to spell out everything. Payment schedule tied to milestones, not just dates. Start and completion dates with penalties for delays. Specific materials by brand and model number. Who pulls permits and when.
No handshake deals. I don’t care if your contractor is your cousin’s best friend. Home Renovation Tips Miprenovate builds on exactly what I am describing here.
Now here’s where you can actually save money without risking your house. The hybrid approach works if you’re smart about it.
Demolition? You can do that. Ripping out old cabinets or tearing up carpet doesn’t require special skills. Just safety gear and a strong back (and maybe some friends with pizza as payment).
Painting is another easy win. Yes, it takes time. But the technique isn’t complicated and the tools are cheap. You’ll save thousands on a whole-house paint job.
But some things are non-negotiable. Anything involving electrical work beyond changing a fixture needs a licensed electrician. Same with plumbing that connects to your main lines. And structural changes always require an engineer’s approval.
I’ve seen people try to DIY electrical work to save a few hundred bucks. Then they fail inspection and have to pay someone to redo it anyway. Or worse, they create a fire hazard that their insurance won’t cover.
For solid home renovation advice miprenovate, focus on what makes financial sense. If you can save $2,000 by spending two weekends painting, that’s probably worth it. If you’d save $500 by spending three weekends learning tile work, maybe not.
Your time has value too.
The goal isn’t to do everything yourself or hire out every task. It’s to make smart choices about where your effort pays off and where professional expertise is worth the cost.
Phase 3: Material Selection and Sustainable Design Choices
You’re past the planning stage now.
This is where your renovation starts to feel real. Where you pick the stuff that’ll actually live in your home for the next decade or two.
And I won’t lie to you. This phase overwhelms most people.
Walk into any home improvement store and you’ll face thousands of options. Tile that looks amazing but chips after a year. Countertops that photograph beautifully but stain if you so much as look at them wrong. Navigating the maze of choices in home improvement can be overwhelming, but with insightful House Improvement Advice Miprenovate, you can confidently select materials that will stand the test of time rather than succumb to fleeting trends.
Some designers will tell you to just pick what you love and worry about durability later. That aesthetics should always win.
But here’s what happens when you follow that advice.
You end up replacing your gorgeous but impractical floors three years in because they can’t handle your actual life. Your kids. Your dog. Your morning coffee routine.
The truth is simpler. You need materials that can take a beating and still look good doing it.
For high-traffic areas, I go with porcelain tile or engineered hardwood. They hold up. Quartz countertops over marble (yes, even though marble looks incredible). Low-VOC paints that won’t make your house smell like a chemical factory for weeks.
These choices save you money because you’re not redoing work.
When it comes to sustainable options, reclaimed wood adds character you can’t fake. Energy-efficient windows cut your bills while keeping rooms comfortable. Water-saving fixtures that actually work (not the ones that make showers feel like a sad drizzle).
Your lighting plan matters more than you think. I’m talking about layering ambient, task, and accent lighting so rooms feel right at different times of day. One overhead light doesn’t cut it anymore.
And if you’re thinking about smart home tech, wire for it now. Running cables later costs three times as much and tears up your fresh walls.
This is the House Renovation Advice Miprenovate clients ask about most. Because getting materials right means your renovation actually lasts.
You’ll walk through your home in five years and still feel good about what you picked.
Phase 4: Navigating Project Execution and Maintenance
You’re going to live in chaos for a while.
I won’t sugarcoat it. Dust gets everywhere. Your morning routine gets thrown off. You’ll eat takeout more than you planned.
Some renovation experts tell you to just move out during construction. Stay with family or rent a place. They say it’s the only way to keep your sanity.
But that’s not realistic for most people.
Moving out doubles your costs. You’re paying for temporary housing PLUS the renovation. And if you’ve got kids in school or a job that ties you to the area, it’s not even an option.
I’ve lived through three major renovations without leaving my home. You can do this.
Set up a base camp in the room farthest from construction. Move your coffee maker there. Keep clean clothes sealed in plastic bins. Create a path through your house that avoids the work zone.
Here’s what nobody tells you about the project management triangle. You know, scope, time, and budget. You can’t actually balance all three perfectly.
Something will give. Always.
Your contractor hits a rotted beam behind your wall. Now you’re looking at a change order. Do you fix it right or patch it and hope? (You fix it right, but that means time or money shifts.)
I keep a running spreadsheet. Every change order goes in with the date and reason. When my budget starts creeping up, I can see exactly where the money went. No surprises at the end.
The final walk-through matters more than you think.
Bring your punch list. I’m talking about a detailed document of everything that’s not quite finished. That outlet cover that’s crooked. The paint touch-up in the corner. The cabinet door that doesn’t close flush.
Don’t hand over final payment until these items are done. Once that check clears, getting your contractor back becomes ten times harder.
Your renovation is done. Congratulations.
Now you need to protect what you just spent all that money on. New hardwood floors need different care than your old carpet did. That tile backsplash requires specific cleaners.
I learned this the hard way. Spent $8,000 on custom cabinets and then used the wrong cleaner. Stripped the finish in three spots.
Get maintenance instructions IN WRITING from your contractor. Ask about warranties. Know what products to use and what to avoid.
Your new space should last decades if you treat it right. The house improvement advice miprenovate approach means thinking long-term from day one.
Set calendar reminders for seasonal maintenance. Check caulking every six months. Reseal grout annually. Small tasks now prevent big repairs later. To ensure your gaming space remains in top condition, remember to set reminders for seasonal maintenance tasks like caulking and grout resealing, allowing you to Miprenovate your setup and avoid costly repairs down the line.
You survived the renovation. Don’t let poor maintenance undo all that work.
From Construction Zone to Dream Home
You now have a complete framework for tackling your home renovation.
I’ve walked you through the four phases that matter: planning, team selection, design, and execution. Each one builds on the last.
I know that overwhelming feeling when you first think about renovating. You’re staring at your space and wondering where to even start. That’s normal.
Here’s why this approach works: You’re replacing guesswork with a clear plan. You stay in control of your project, your budget, and your timeline.
No more second-guessing every decision or worrying that you missed something important.
Your renovation journey starts with a single step. Use this guide as your blueprint and begin with Phase 1.
The home you’ve always envisioned is waiting on the other side of that first decision.
For more home renovation advice miprenovate offers, explore our design inspiration galleries and DIY project breakdowns. They’ll help you refine your vision as you move forward.
Start today. Your dream home won’t build itself. Miprenovate.
 Rovelle Vosswynne has opinions about gardening and landscaping tips. Informed ones, backed by real experience — but opinions nonetheless, and they doesn't try to disguise them as neutral observation. They thinks a lot of what gets written about Gardening and Landscaping Tips, DIY Project Tips, Home Renovation Ideas is either too cautious to be useful or too confident to be credible, and they's work tends to sit deliberately in the space between those two failure modes.
Reading Rovelle's pieces, you get the sense of someone who has thought about this stuff seriously and arrived at actual conclusions — not just collected a range of perspectives and declined to pick one. That can be uncomfortable when they lands on something you disagree with. It's also why the writing is worth engaging with. Rovelle isn't interested in telling people what they want to hear. They is interested in telling them what they actually thinks, with enough reasoning behind it that you can push back if you want to. That kind of intellectual honesty is rarer than it should be.
What Rovelle is best at is the moment when a familiar topic reveals something unexpected — when the conventional wisdom turns out to be slightly off, or when a small shift in framing changes everything. They finds those moments consistently, which is why they's work tends to generate real discussion rather than just passive agreement.
Rovelle Vosswynne has opinions about gardening and landscaping tips. Informed ones, backed by real experience — but opinions nonetheless, and they doesn't try to disguise them as neutral observation. They thinks a lot of what gets written about Gardening and Landscaping Tips, DIY Project Tips, Home Renovation Ideas is either too cautious to be useful or too confident to be credible, and they's work tends to sit deliberately in the space between those two failure modes.
Reading Rovelle's pieces, you get the sense of someone who has thought about this stuff seriously and arrived at actual conclusions — not just collected a range of perspectives and declined to pick one. That can be uncomfortable when they lands on something you disagree with. It's also why the writing is worth engaging with. Rovelle isn't interested in telling people what they want to hear. They is interested in telling them what they actually thinks, with enough reasoning behind it that you can push back if you want to. That kind of intellectual honesty is rarer than it should be.
What Rovelle is best at is the moment when a familiar topic reveals something unexpected — when the conventional wisdom turns out to be slightly off, or when a small shift in framing changes everything. They finds those moments consistently, which is why they's work tends to generate real discussion rather than just passive agreement.