I love the moment a renovation starts. The possibilities feel endless.
Then the dust hits.
You’re dealing with more than just a messy room. Construction debris spreads through your entire home if you don’t stay ahead of it. It gets into vents, settles on furniture three rooms away, and turns your daily routine into a constant battle with grime.
I’ve managed enough renovations to know that the mess will break you if you don’t have a system.
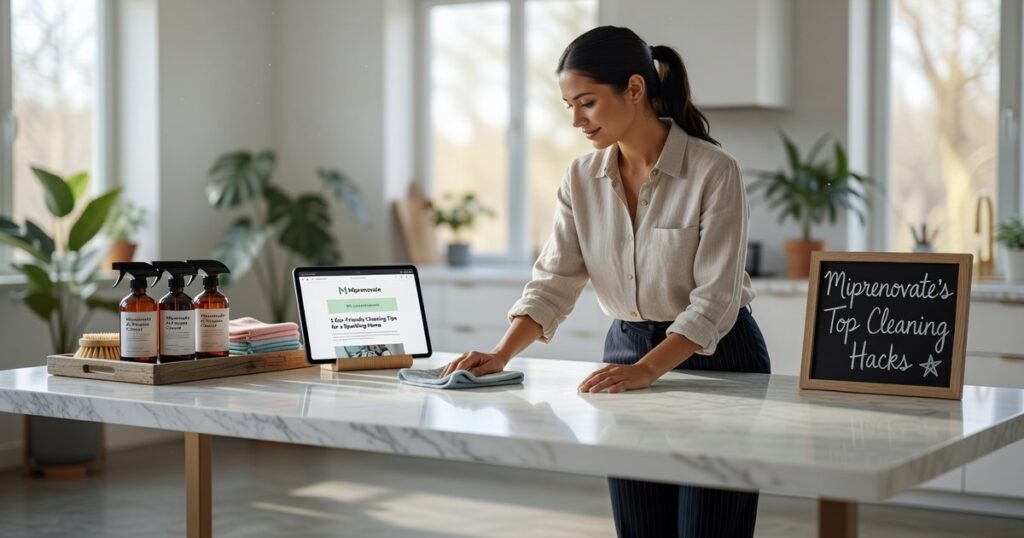
This guide gives you that system. I’m sharing the cleaning hacks miprenovate strategies I’ve tested through years of tearing apart and rebuilding spaces.
You’ll learn how to contain dust before it migrates, what daily maintenance actually works (not the stuff that sounds good but wastes your time), and how to tackle the final deep clean without losing your mind.
The goal isn’t perfection during construction. That’s impossible.
The goal is control. You want to live in your home while it transforms without feeling like you’re camping in a construction zone.
Let’s make this renovation less stressful.
Phase 1: Proactive Containment — Before the First Hammer Swings
The best cleaning hack? Stop the mess before it starts.
I know some contractors will tell you not to bother with all this prep work. They say it takes too much time and you’ll clean it up anyway. Just get to work and deal with the dust later.
Here’s why that’s wrong.
I’ve seen what happens when you skip containment. Drywall dust settles into every corner of your house. It gets into your HVAC system and blows around for months. You find it in closets three rooms away from where you were working.
Trust me. An hour of prep saves you days of cleaning.
Isolate the Work Zone
Start with heavy-duty plastic sheeting. The 6-mil stuff works best because it won’t tear when you brush against it.
Use painter’s tape to seal off doorways and any openings. Get a zippered plastic door (they’re about $15 at any hardware store) so you can move in and out without breaking your seal every time.
Protect Your Floors and Furniture
Drop cloths are fine for painting. But renovation work? You need something tougher.
I use Ram board for high-traffic paths. It’s thick cardboard that actually protects against scratches and dents when you’re hauling materials through. Regular cardboard works too if you’re on a budget.
For interior decoration miprenovate projects, cover furniture with plastic sheeting and tape it down. Dust finds its way under loose covers.
Control Airflow
Turn off your HVAC system before you start. Seal both supply and return vents in the work area with plastic and tape.
This is one of those cleaning hacks Miprenovate readers ask me about all the time. Your HVAC will suck up fine dust and spread it through your entire house if you don’t shut it down.
Phase 2: The Daily Tidy-Up — Your 15-Minute End-of-Day Ritual
I’m going to be honest with you.
The biggest mistake I see people make during renovations? They skip the daily cleanup because they’re tired.
I get it. You’ve been working all day. The last thing you want to do is clean.
But here’s what happens when you don’t. Dust settles into every crack. Debris piles up. What could’ve been a 15-minute task turns into a three-hour nightmare on Saturday.
Some people say just do a big cleanup once a week. They argue that stopping to clean every day kills your momentum and wastes time you could spend making progress.
And look, I understand that thinking.
But after years of working on miprenovate projects, I’ve learned something. Those 15 minutes at the end of each day save you hours later. Plus your family doesn’t have to live in a construction zone that gets worse every single day. Through my experiences with Miprenovate projects, I’ve discovered that dedicating just a few minutes each day to organization can significantly reduce stress and prevent your home from becoming an overwhelming construction zone.
Your Shop-Vac is Non-Negotiable
Don’t use your regular vacuum. Just don’t.
Construction dust will wreck it. Drywall particles and wood dust are too fine for standard filters. They’ll blow right through and either clog the motor or shoot back into your air.
You need a shop-vac with a fine dust filter. Better yet, get one with a HEPA filter if you’re dealing with drywall or sanding work.
I keep mine right at the edge of my work zone. Makes it easy to grab without thinking about it.
The Actual Process Takes Less Time Than You Think
Start with the big stuff. Grab a broom and sweep larger debris into a pile. Wood scraps, drywall chunks, whatever fell during the day.
Then hit it with the shop-vac. Go over the entire work area and about three feet beyond it. Dust travels farther than you’d expect.
(Pro tip: Run the shop-vac in overlapping passes like you’re mowing a lawn. You’ll catch more on the first go.)
After that, take a damp microfiber cloth and wipe down any horizontal surfaces just outside your work zone. Windowsills, counters, whatever caught the drift. This is where cleaning hacks miprenovate style really pay off because you’re preventing buildup before it becomes a problem.
One Bag, One Rule
Keep a heavy-duty contractor bag right in your work area. Not a kitchen trash bag. Those rip.
Every scrap goes in there. Every off-cut. Every piece of packaging.
At the end of the day, tie it up and get it out of your living space. Put it in the garage or outside until trash day.
This one habit alone will change how your home feels during a renovation. You’re not walking past growing piles of garbage every time you go to the kitchen.
Fifteen minutes. That’s all this takes once you get into the rhythm.
And the peace of mind? Worth every second.
Your Renovation Cleaning Toolkit: The Must-Have Supplies

I’m standing in what used to be my dining room.
There’s a fine layer of drywall dust coating everything. I can feel the grit under my shoes with every step. The air tastes chalky when I breathe.
This is what every renovation looks like at some point. I cover this topic extensively in House Advice Miprenovate.
You need the right gear to tackle it. Not fancy stuff. Just tools that actually work.
The Heavy Lifters
Start with a good shop-vac. I’m talking about one that can handle chunks of drywall and sawdust without choking. The whirring sound of a quality shop-vac is music when you’re pulling debris out of corners.
Get a sturdy push broom too. The kind with stiff bristles that scrape dust off concrete without bending.
And contractor bags. Buy way more than you think you need. They’re thicker than regular trash bags and they don’t split when you’re hauling out broken tile.
The Dust Catchers
Here’s where most people mess up.
They use regular rags that just push dust around. You need microfiber cloths. Lots of them. They actually trap the particles instead of launching them back into the air.
A Swiffer-style mop with dry cloths works great for quick floor passes between work sessions. You can feel the difference under your feet immediately.
Tack cloths are sticky and weird to touch but they grab fine dust before you paint. Nothing else works quite the same way.
Pro Tip: The DIY Air Scrubber
Want to clear the air without spending hundreds?
Tape a cheap furnace filter to the back of a box fan. That’s it. The fan pulls dusty air through the filter and pushes out cleaner air on the other side. For gamers looking to improve their home setup while keeping the air fresh, incorporating simple Renovation Tips Miprenovate, like taping a cheap furnace filter to the back of a box fan, can make a surprising difference in creating a cleaner and more comfortable gaming environment.
I learned this from cleaning hacks miprenovate and it’s saved me so much money. You’ll see the filter turn gray within hours.
These Renovation Tips Miprenovate aren’t complicated.
But they work.
Phase 3: The Post-Project Deep Clean — Restoring Order
The project’s done.
Now comes the part most people get wrong.
I see it all the time. Someone finishes a beautiful renovation and then cleans their floors first. Then they wipe down the walls. Dust falls everywhere and they have to start over.
Here’s what actually works.
You need a system. Not just any system, but one that respects gravity.
Always Clean Top-to-Bottom
Start with your ceilings. Then hit light fixtures and the tops of walls.
Why? Because dust doesn’t float upward. It falls.
If you clean your floors before you clean your ceiling fan, you’re just making more work for yourself. I learned this the hard way after redoing my kitchen in Daytona Beach and having to mop three times.
Some people argue you should spot-clean as you go, tackling whatever looks dirtiest first. They say it’s more satisfying to see immediate results.
But that approach costs you time. You end up recleaning the same surfaces when dust settles from above.
Tackling Walls and Trim
Walls collect more than you think during a project.
Start with a dry microfiber cloth or duster. Just run it along the surface to grab loose particles.
Then follow with a slightly damp cloth and gentle cleaner if you need it. Most times you won’t.
Pay attention to baseboards. Window sills too. Door frames are dust magnets that everyone forgets about.
Here’s where the comparison matters. You could use paper towels, but microfiber cloths work better and you can wash them. Paper towels leave lint and cost more over time.
| Method | Pros | Cons |
|---|---|---|
| ——– | —— | —— |
| Dry microfiber first | Catches loose dust without spreading it | Requires second pass for stuck-on grime |
| Wet cleaning only | Faster single-step process | Turns dust into muddy streaks |
| Top-to-bottom approach | Clean once and you’re done | Takes discipline to not jump around |
The Final Floor Clean
This is your three-step finish.
First, vacuum every inch. Get into corners and along edges where drywall dust loves to hide.
Second, mop with clean water and whatever cleaner works for your floor type. Wood needs different care than tile.
Third, mop again with just clean water. This pulls up any cleaner residue that might leave streaks or attract dirt later.
You can find more cleaning hacks miprenovate on our site, but honestly this three-step process handles most post-project messes.
The difference between doing this right and doing it fast? About 30 minutes.
But doing it right means you actually finish. You don’t come back the next day and find dust you missed or sticky floors from leftover cleaner. Achieving a polished finish in your gaming space can be as rewarding as a high score, especially when you utilize resources like Interior Decoration Miprenovate to ensure that every detail is meticulously addressed, leaving no dust or sticky residue behind.
Your space is done. Really done.
Enjoy Your New Space, Mess-Free
You now have a complete three-phase strategy to handle renovation cleaning without losing your mind.
Construction dust doesn’t have to take over your life. That’s the pain point we set out to solve, and this system does exactly that.
Here’s why it works: You contain the mess before it spreads. You maintain control with daily habits. You finish strong with a methodical final clean.
No guesswork. No wasted effort.
I’ve seen too many people get buried under dust and debris during their renovations. They spend weeks scrubbing when they could be enjoying their new space.
This approach is different. Proactive containment stops problems before they start. Daily maintenance keeps things manageable. The final clean wraps everything up without drama.
Now it’s your turn to put this into action.
Start with phase one before your contractor swings the first hammer. Follow the cleaning hacks miprenovate system through each phase. Stay consistent with your daily routines.
You’ll spend less time cleaning and more time actually living in your beautifully renovated home.
That’s the whole point of renovating in the first place.
 Rovelle Vosswynne has opinions about gardening and landscaping tips. Informed ones, backed by real experience — but opinions nonetheless, and they doesn't try to disguise them as neutral observation. They thinks a lot of what gets written about Gardening and Landscaping Tips, DIY Project Tips, Home Renovation Ideas is either too cautious to be useful or too confident to be credible, and they's work tends to sit deliberately in the space between those two failure modes.
Reading Rovelle's pieces, you get the sense of someone who has thought about this stuff seriously and arrived at actual conclusions — not just collected a range of perspectives and declined to pick one. That can be uncomfortable when they lands on something you disagree with. It's also why the writing is worth engaging with. Rovelle isn't interested in telling people what they want to hear. They is interested in telling them what they actually thinks, with enough reasoning behind it that you can push back if you want to. That kind of intellectual honesty is rarer than it should be.
What Rovelle is best at is the moment when a familiar topic reveals something unexpected — when the conventional wisdom turns out to be slightly off, or when a small shift in framing changes everything. They finds those moments consistently, which is why they's work tends to generate real discussion rather than just passive agreement.
Rovelle Vosswynne has opinions about gardening and landscaping tips. Informed ones, backed by real experience — but opinions nonetheless, and they doesn't try to disguise them as neutral observation. They thinks a lot of what gets written about Gardening and Landscaping Tips, DIY Project Tips, Home Renovation Ideas is either too cautious to be useful or too confident to be credible, and they's work tends to sit deliberately in the space between those two failure modes.
Reading Rovelle's pieces, you get the sense of someone who has thought about this stuff seriously and arrived at actual conclusions — not just collected a range of perspectives and declined to pick one. That can be uncomfortable when they lands on something you disagree with. It's also why the writing is worth engaging with. Rovelle isn't interested in telling people what they want to hear. They is interested in telling them what they actually thinks, with enough reasoning behind it that you can push back if you want to. That kind of intellectual honesty is rarer than it should be.
What Rovelle is best at is the moment when a familiar topic reveals something unexpected — when the conventional wisdom turns out to be slightly off, or when a small shift in framing changes everything. They finds those moments consistently, which is why they's work tends to generate real discussion rather than just passive agreement.