
You’re ready to transform your house, but every time you start planning, the process feels like too much.
I’ve been there. The excitement of imagining your new space gets buried under questions about where to even start.
Here’s the truth: most renovation stress comes from not having a clear plan. You don’t need more inspiration boards right now. You need a roadmap that actually works.
I’m going to walk you through the exact steps that keep projects on track and on budget. This comes from years of working through renovations and figuring out what separates smooth projects from disasters.
House Advice MIPRenovate exists because I got tired of seeing people abandon their dream projects halfway through. Or worse, finish them but spend twice what they planned.
This isn’t a collection of pretty ideas. It’s a strategic plan that takes you from your first thought about renovating to the day you step back and see your finished space.
You’ll learn how to sequence decisions, avoid expensive mistakes, and keep moving forward even when problems pop up (because they will).
No fluff. Just the practical steps that work.
Phase 1: The Blueprint – Defining Your Renovation’s Scope and Goals
I’ve seen too many renovations go sideways because people skipped this part.
They jump straight to picking out fixtures and paint colors before they even know what problem they’re solving. Then six months later, they’re over budget and still dealing with the same issues that started the whole thing.
Here’s what I tell everyone who asks me about starting a renovation.
You need to get clear on why you’re doing this in the first place.
Start With the Real Problem
Some people say you should just follow your gut and renovate what feels right. They argue that overthinking kills creativity and you’ll end up with a space that feels sterile.
But that’s not how this works.
Your gut might tell you to rip out the kitchen because you saw something beautiful on Instagram. Meanwhile, the real issue is that your family room is too small for how you actually live.
I learned this the hard way on my first project here in Daytona Beach. I wanted new countertops when what I really needed was better storage.
So before you do anything else, write down the actual problems:
- Is your space too cramped for your family?
- Does the layout make daily tasks harder than they should be?
- Are you dealing with outdated systems that cost you money?
- Does the style make you avoid spending time in certain rooms?
Be honest. Not aspirational.
Separate Needs From Wants
This is where most budgets explode.
You need a working HVAC system. You want that specific Italian tile you saw at MIP Renovate.
Both matter. But one comes first.
I use a simple two-column approach. Left side is needs. Right side is wants. Needs get funded first, always. Wants get added if the budget allows.
A need solves a functional problem or prevents damage. A want makes things prettier or slightly more convenient.
Build Your Vision Board the Right Way
Now you can start gathering inspiration.
But here’s the catch. You’re not collecting every beautiful room you see. You’re looking for specific answers to your specific problems.
Pick one style direction. Choose a color palette with maybe three main colors. Select materials that actually work for how you live (not just how they photograph).
If you have kids and two dogs, that white linen sofa isn’t realistic. I don’t care how good it looks.
Think Past Next Year
The question I ask everyone: will this renovation still make sense in ten years?
Your life changes. Kids grow up. Work situations shift. Bodies age.
That trendy open concept might not work when you need a quiet home office. Those stairs might become a problem later.
And if you’re thinking about resale value, focus on improvements that appeal broadly. Most buyers want good bones and neutral finishes they can personalize.
The goal here isn’t to plan every detail. It’s to get clear on what you’re actually trying to accomplish so you don’t waste time and money fixing the wrong things.
Phase 2: The Reality Check – Building a Bulletproof Budget
You know what kills most renovation projects?
Not bad contractors. Not even poor design choices.
It’s the budget that falls apart two weeks in.
I’ve watched people start strong and then panic when they realize they’re $15,000 short with half the work still undone. It’s brutal.
Here’s what I do differently.
The 3-Quote Rule
Get three detailed quotes for any major work. Not ballpark estimates. Real quotes with line items.
This does two things for you. First, you’ll understand what the actual market rate is in your area. Second, you’ll spot the contractors who are either lowballing to get the job or padding their numbers. By using platforms like Miprenovate, you can not only gauge the true market rate for renovations in your area but also identify contractors who may be underquoting or overcharging for their services.
(I once got quotes that ranged from $8,000 to $22,000 for the same bathroom. Same scope. Huge difference.)
Break It Down
Create a spreadsheet. List everything.
Materials. Labor. Permits. Fixtures. Delivery fees. That random thing you forgot about.
When you see it all written out, you make better decisions. You’ll notice you budgeted $200 for paint but $8,000 for countertops you don’t really need.
Your Safety Net
Set aside 15-20% for the unexpected.
Not optional. Not negotiable.
You will find something behind those walls. Water damage. Outdated wiring. Mold. Supply chain delays that force you to pick a pricier alternative.
This contingency fund is what keeps you sleeping at night when your contractor calls with bad news.
Smart Money Moves
Invest in quality flooring and good windows. You’ll see the return in comfort and resale value.
Save on standard drywall and paint. Nobody notices the difference.
For house advice miprenovate projects, this approach means you finish on budget instead of draining your savings halfway through.
Phase 3: The Vision – Smart Design and Sustainable Choices
You’ve got your budget locked down and your team ready to go.
Now comes the fun part.
This is where you decide what your space will actually become. Not just how it looks, but how it lives.
Start with flow.
Walk through your space and pay attention to how you move. Where do you naturally go when you cook? When you’re getting ready in the morning? When you’re carrying groceries inside?
Your layout should work with those patterns, not against them.
Take the kitchen. The work triangle (sink, stove, fridge) isn’t just some designer rule. It’s about cutting down the steps between the things you use most. If you’re walking across the room every time you need water while cooking, something’s wrong.
Materials matter more than you think.
I see people fall in love with marble countertops all the time. And yes, they’re gorgeous. But if you’re the type who spills coffee and leaves wine glasses sitting overnight, you’ll hate yourself in six months when those stains set in.
Quartz gives you that same high-end look without the constant worry. It’s nonporous and takes a beating.
Same goes for flooring. Luxury vinyl plank can look like hardwood but handles moisture way better in bathrooms and basements.
Go green where it counts.
Sustainable doesn’t mean spending twice as much on everything.
Low-VOC paints cost about the same as regular paint. They just don’t fill your house with fumes for weeks. Energy-efficient windows cost more upfront but they’ll cut your heating and cooling bills for the next twenty years.
Reclaimed wood for accent walls? Often cheaper than new materials and it adds character you can’t fake.
Better insulation in your attic might be the least exciting upgrade you make, but it’s probably the smartest.
Lighting changes everything.
I mean EVERYTHING.
You need three types. Ambient lighting fills the room. Task lighting helps you actually see what you’re doing. Accent lighting makes the space feel intentional.
One overhead fixture isn’t enough. Add under-cabinet lights in the kitchen. Put sconces by the bathroom mirror. Use dimmers so you can adjust the mood.
The right lighting can make a small room feel bigger and a cold room feel warm.
Before you finalize anything, check out miprenovate cleaning tips from myinteriorpalace for maintaining your new finishes once the work is done.
Your vision should solve problems, not create new ones.
Phase 4: The Team – Deciding Between DIY and Hiring Professionals
Let me be straight with you.
Most renovation guides tell you to either do everything yourself or hire out every single task. That’s not how real renovations work.
I’ve seen homeowners rip out perfectly good drywall because they thought they could handle it. I’ve also watched people pay contractors $500 to paint a bedroom they could’ve knocked out in a weekend. In the realm of home renovations, it’s crucial to find reliable resources, such as Kitchen Improvement Ideas Miprenovate, to avoid the pitfalls of costly mistakes that many homeowners make when attempting DIY projects without proper guidance.
Both mistakes cost money.
Here’s what nobody talks about. The decision isn’t really about DIY versus hiring. It’s about knowing where you fall on that spectrum for each specific task.
Can you actually do this yourself?
Ask yourself these questions. Do you own the tools already? Can you finish this in a reasonable timeframe? (Not someday. Actually finish it.)
And here’s the big one. Does this job require a permit?
If it needs a permit, you’re probably looking at electrical, plumbing, or structural work. That’s licensed territory. You can argue all day that you watched enough YouTube videos, but your insurance company won’t care when something goes wrong.
Paint, tile, basic carpentry? Fair game if you’ve got the time.
Rewiring your kitchen or moving a load-bearing wall? Call someone.
Finding the right contractor
Most people ask their neighbors for recommendations and stop there. That’s a start, but it’s not enough.
Check their license. Every state has a database you can search. If they dodge this question, walk away.
Ask for three references from jobs they finished in the last year. Not five years ago. Last year. Then actually call those people and ask what went wrong. (Something always goes wrong. You want to know how they handled it.)
Look at their previous work. Not just photos. Go see a finished project if you can.
Get everything in writing. Timeline, payment schedule, materials, who pulls permits. I’ve seen too many handshake deals turn into legal nightmares.
Who does what
A general contractor manages the whole project. They hire the subs, order materials, and keep things on schedule. You need one if you’re doing multiple rooms or anything structural.
An architect draws up plans and makes sure your vision actually works with building codes. You’ll need one for additions or major layout changes.
An interior designer picks finishes, furniture, and makes spaces look good. They’re worth it if you freeze up at tile stores or want a cohesive look throughout your home.
Here’s what I wish someone had told me earlier. You don’t need all three for every project. A bathroom refresh? Maybe just a designer. Adding a second story? You’ll want the architect and contractor team.
The house advice miprenovate approach is simple. Match the professional to the complexity of the work, not to some arbitrary budget percentage.
Your cousin who’s “good with tools” might save you money on labor. But if he disappears halfway through or does subpar work, you’ll spend twice as much fixing it.
Choose based on the job, not just the price.
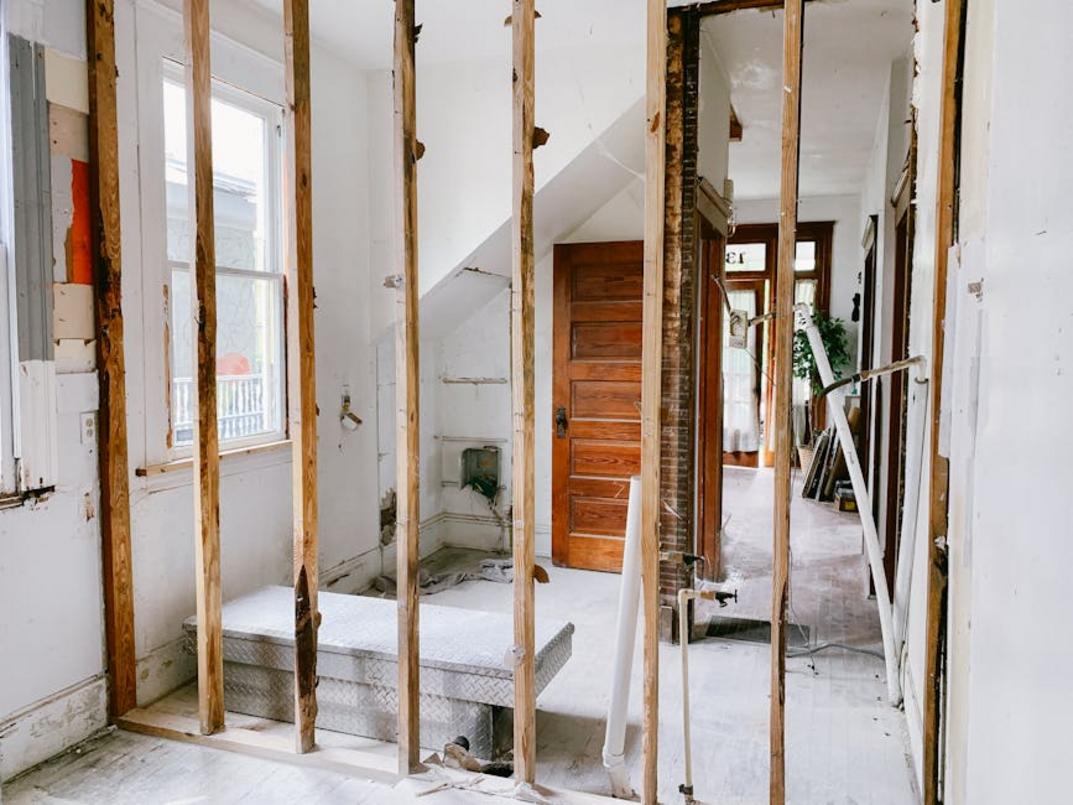
Phase 5: The Execution – Surviving the Renovation Process
You’ve signed the contract. The crew shows up Monday morning.
Now comes the part nobody warns you about.
Most renovation guides tell you to “stay in touch with your contractor” and “be prepared for some mess.” Thanks for nothing, right?
Here’s what I learned after watching homeowners (and making my own mistakes). The execution phase isn’t just about surviving dust and noise. It’s about staying ahead of problems before they derail your whole project.
Set up a real communication system.
I’m not talking about texting your contractor whenever you panic. Pick one day each week for a quick walkthrough. Friday afternoons work well because you can address issues before the weekend.
Keep these check-ins short. Ten minutes tops. Review what got done, what’s coming next week, and any decisions you need to make.
Some contractors will push back on this. They’ll say they’re too busy or that you’re micromanaging. But the good ones? They appreciate it because it keeps everyone aligned.
Turn your home into a construction zone the smart way.
You can’t avoid the mess. But you can contain it.
Set up a temporary kitchen in your garage or basement if you’re doing kitchen improvement ideas miprenovate style. Get a hot plate, a mini fridge, and paper plates. It’s not glamorous but it beats eating takeout for three months.
Seal off rooms you’re not renovating with thick plastic sheeting and painter’s tape. The cheap stuff rips. Spend the extra five bucks on the heavy duty version. Cleaning Hacks Miprenovate builds on exactly what I am describing here.
Protect your floors even in areas that aren’t being worked on. Contractors track dust everywhere. Ram board works better than drop cloths because it actually stays in place.
Document like your money depends on it.
Because it does.
Take photos before demo starts. I mean everything. That crack in the wall you forgot about? Your contractor might find it and claim it’s new damage.
During the work, snap pictures every few days. You want a visual record of what’s behind those walls before drywall goes up.
Keep a folder (digital or physical, I don’t care) with your contract, all change orders, receipts, and permits. When something goes sideways and you need to reference what you agreed to, you’ll thank yourself.
One thing I don’t see other house advice miprenovate sources mention? Keep a simple log of who showed up each day and what they worked on. Just a quick note on your phone. If there’s ever a dispute about timeline or labor costs, you’ve got receipts. Incorporating Miprenovate Cleaning Tips From Myinteriorpalace can greatly enhance your home maintenance routine, especially when paired with the practice of logging daily visits and tasks to protect yourself from potential disputes over timelines and labor costs.
The execution phase tests your patience. But with the right systems in place, you’ll get through it without losing your mind or your budget.
From House to Home, Your Vision Realized
You came here feeling overwhelmed by the idea of a renovation.
I get it. The thought of tearing apart your space and putting it back together can feel massive.
But now you have a structured five-phase approach. You know how to break down what seemed impossible into steps you can actually take.
What started as a vague dream is now something manageable. Maybe even exciting.
The difference between a renovation that drains you and one that energizes you comes down to three things: methodical planning, realistic budgeting, and smart decision-making.
You don’t need to figure it all out today.
Start small. Grab a notebook and create your Needs vs. Wants list right now. Write down what your space absolutely must have and what would be nice to include if the budget allows.
That simple list turns your dream renovation into a concrete plan.
Your home is waiting. The vision you’ve been carrying around is closer than you think.
For more house advice miprenovate has you covered every step of the way.
 Rovelle Vosswynne has opinions about gardening and landscaping tips. Informed ones, backed by real experience — but opinions nonetheless, and they doesn't try to disguise them as neutral observation. They thinks a lot of what gets written about Gardening and Landscaping Tips, DIY Project Tips, Home Renovation Ideas is either too cautious to be useful or too confident to be credible, and they's work tends to sit deliberately in the space between those two failure modes.
Reading Rovelle's pieces, you get the sense of someone who has thought about this stuff seriously and arrived at actual conclusions — not just collected a range of perspectives and declined to pick one. That can be uncomfortable when they lands on something you disagree with. It's also why the writing is worth engaging with. Rovelle isn't interested in telling people what they want to hear. They is interested in telling them what they actually thinks, with enough reasoning behind it that you can push back if you want to. That kind of intellectual honesty is rarer than it should be.
What Rovelle is best at is the moment when a familiar topic reveals something unexpected — when the conventional wisdom turns out to be slightly off, or when a small shift in framing changes everything. They finds those moments consistently, which is why they's work tends to generate real discussion rather than just passive agreement.
Rovelle Vosswynne has opinions about gardening and landscaping tips. Informed ones, backed by real experience — but opinions nonetheless, and they doesn't try to disguise them as neutral observation. They thinks a lot of what gets written about Gardening and Landscaping Tips, DIY Project Tips, Home Renovation Ideas is either too cautious to be useful or too confident to be credible, and they's work tends to sit deliberately in the space between those two failure modes.
Reading Rovelle's pieces, you get the sense of someone who has thought about this stuff seriously and arrived at actual conclusions — not just collected a range of perspectives and declined to pick one. That can be uncomfortable when they lands on something you disagree with. It's also why the writing is worth engaging with. Rovelle isn't interested in telling people what they want to hear. They is interested in telling them what they actually thinks, with enough reasoning behind it that you can push back if you want to. That kind of intellectual honesty is rarer than it should be.
What Rovelle is best at is the moment when a familiar topic reveals something unexpected — when the conventional wisdom turns out to be slightly off, or when a small shift in framing changes everything. They finds those moments consistently, which is why they's work tends to generate real discussion rather than just passive agreement.