Introduction
Vlogging hasn’t faded. Despite tighter attention spans, platform drama, and the ongoing flood of content, video storytelling has held ground. It’s adapted, shifted formats, and found new ways to connect. Through it all, creators kept showing up—with raw updates, daily snapshots, and long-form deep dives that built trust and captured attention.
Now, 2024 is drawing some new lines. Algorithms favor the consistent, not just the viral. Audiences want substance packed into fast formats. And tools powered by AI are speeding up workflows, not replacing the human on camera. Creators who understand the shifts—and adjust without losing their voice—are set to thrive. Ignore the trends, and you risk becoming invisible. Stay current, and you stay in the game.
A cordless drill has become the go-to tool for just about every home project you can name. Hanging shelves, building furniture, fixing a sagging cabinet door, anchoring into drywall—it’s the workhorse of DIY and small-scale professional setups alike. It’s portable, versatile, and a time-saver.
The real game changer? Lithium-ion batteries. Unlike older models that drained fast and lost charge on the bench, lithium-ion batteries hold power longer and recharge quicker. That means less downtime and no sudden sputtering out when you’re halfway through drilling into a stud.
When shopping for one, don’t overthink it—but do pay attention to what matters. Look for adjustable torque settings so you don’t strip screws or drive them too deep. Chuck size tells you what bits it can handle—3/8 inch works for most, but 1/2 inch gives more range. And of course, always check battery life. A good battery should last through a full session without bailing before you’re done. Simple, solid, reliable. That’s the drill you’ll keep reaching for.
Precision matters. Being off by as little as one-eighth of an inch can throw your entire build off course. That’s especially true when you’re cutting trim, hanging shelves, or installing cabinets. A small error early in the process only magnifies as you move forward. The result? Gaps, misalignments, and hours of frustrating do-overs.
That’s why a 25-foot tape measure is worth having in your kit. Sure, the little 12-foot pocket version is easier to carry, but it rarely pulls its weight on bigger jobs. Longer tapes give you flexibility, reduce the need for guesswork, and allow you to measure across rooms or larger spaces without shifting positions or asking someone for help. Think of it this way: you’d rather be slightly overprepared than forced to re-cut because your measure came up short.
Nothing ruins a clean DIY job faster than crooked shelves or off-center frames. You can have the best gear, the sleekest vlog backdrop, even top-tier lighting—but if that floating shelf is slanted, followers notice. And they’ll comment.
Here’s where the level comes in. The big debate? Magnetic vs. digital. Magnetic bubble levels are old school, no batteries, no fuss. Great for sticking onto metal surfaces and getting a quick read. If you’re casually setting up gear or doing light fixes, they’re all you need.
Digital levels, though, bring precision. If you’re doing complex rigging, camera mounts, or working in low light, the accuracy matters. Some models even beep when you’re dead level. The downside: they’re bulkier, pricier, and need charging.
Bottom line: pick the tool that aligns with how deep you go. If a crooked tripod or tilted wall frame isn’t acceptable on camera—or in your own space—invest in the right level. One tool, fewer mistakes. Simple math.
A hammer’s not just a hammer when you’re filming your life around tools or doing DIY content. Whether you’re driving 16-penny nails or prying up old baseboards, your choice of hammer shows up in the footage—and it affects your workflow. For nail driving, you want a head that gives solid impact without needing a full wind-up every swing. Pulling nails and light demo work benefit from a claw that doesn’t slip or bend under pressure.
But it’s not all about brute force. Weight and handle grip balance out the picture. Too heavy, and fatigue sets in fast. Too light, and you sacrifice power and control. A cushioned, anti-slip handle saves your hand over long takes and tight angles. Most vloggers aren’t framing houses, but they need tools that work well through multiple retakes and sketchy lighting. The right hammer handles the job and doesn’t look clumsy on camera.
The Utility Knife: Small Tool, Big Impact
The utility knife doesn’t get enough credit. It’s one of those tools that quietly saves the day—cutting drywall, trimming wallpaper, slicing through tough packaging with clean, straight lines. If you’re doing any sort of setup, teardown, or DIY studio improvement, this knife earns its keep time and again.
Still, it’s a blade, and blades demand respect. Use one with a retractable feature and always engage the lock when not in use. Keep spare blades in a dedicated container, not loose in a drawer. Dull edges are dangerous and unpredictable, so swap them out regularly. Simple rules, but they keep fingers intact and workflows smooth.
Stud finders seem simple, but anyone who’s guessed wrong knows the pain of a TV mount tearing out of drywall. If you’re hanging anything heavier than a picture frame—TVs, shelves, cabinets—you need to hit the studs. Period.
Not all stud finders are created equal. Magnetic models rely on picking up metal screws or nails in the wall. They’re cheap and don’t need batteries, but they also miss more than they hit. Sensor-based models use electronic detection to find density changes in the wall—basically, they detect the edges of studs. They’re more accurate, especially on modern walls, but you’ll need to spend a little more upfront.
In short, use a tool you can trust. If you’re going to anchor real weight, don’t guess and patch later. Sensor stud finders are usually more reliable, especially for renovations or renters trying to avoid angry landlords.
Want to build it right from the jump? Check out this no-fluff guide: How to Build a Floating Shelf Step-by-Step
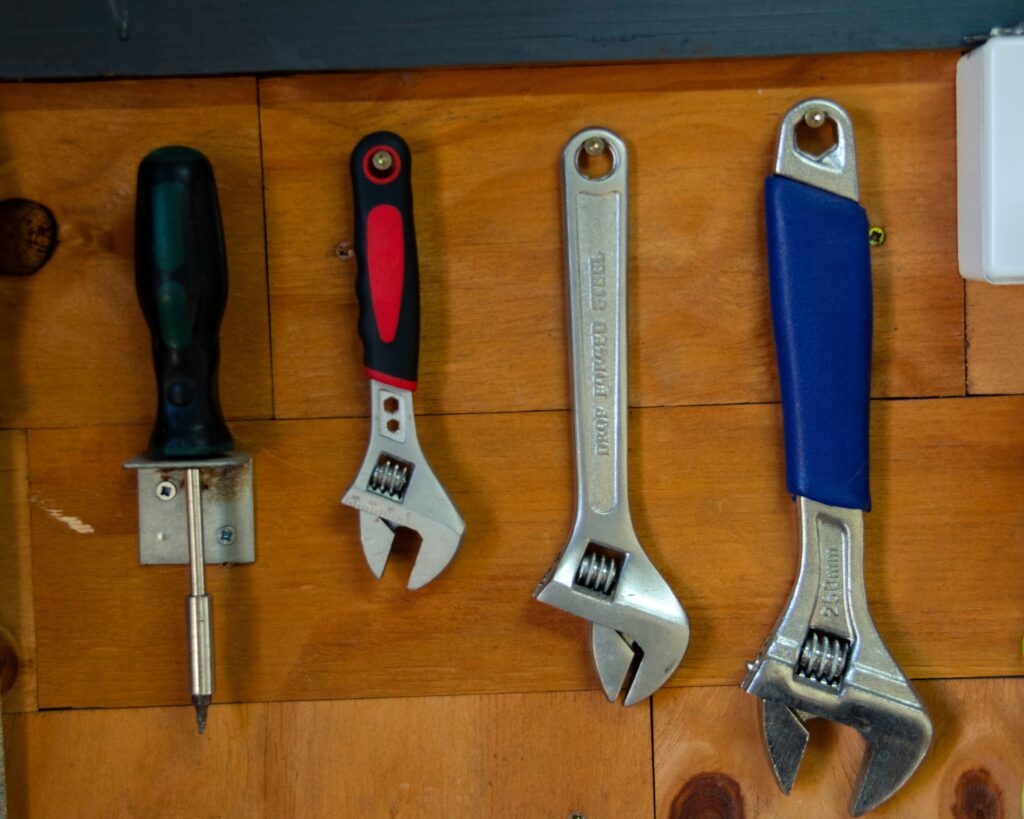
Whether you’re tightening bolts, adjusting pipe fittings, or dealing with any sort of assembly project, a solid set of pliers is your best friend. Versatility is the name of the game. You don’t want a separate tool for every little job, especially when one pair can handle most of them without breaking a sweat.
But here’s what really matters: grip and jaw calibration. A strong, comfortable grip saves your hands from strain across long sessions, while properly calibrated jaws mean less slipping and more control. That adds up to faster work, fewer do-overs, and a lower risk of stripped parts or pinched fingers. Basically, if your tool grabs right the first time, you get it done quicker. Simple as that.
A speed square might look like a simple triangle, but it earns its place in every toolbox. It’s essential when you’re framing, doing angle cuts, or planning any layout that needs to stay accurate. Whether you’re throwing up a quick shed wall or building a deck, this little tool gives you clean lines and consistent angles with almost no thought.
Use it like a saw guide when you’re doing crosscuts. Lay it against your wood, line it up, and go. No guesswork. Flip it on its side, and it becomes a protractor for laying out rafters or stair stringers. Need quick marks for spacing or depth? It doubles as a ruler and marking guide. No batteries. No bells. Just steel, angles, and job-site-ready utility.
Smoothing out wood, prepping for a fresh coat of paint, or knocking down rough edges—most DIYers reach for a sander. But picking the right one can save you frustration and time. Both orbital and sheet sanders have their place, but for most people doing general home projects, an orbital sander is the better choice.
Orbital sanders move in a circular pattern and are good for quick material removal without gouging the surface. They’re easy to handle and leave fewer swirl marks, making them ideal for finishing tasks. They also work well on curved or uneven surfaces.
Sheet sanders, on the other hand, move in a straight-line motion. They’re better when you need more precision or are working near edges and corners. But they tend to leave visible sanding patterns if you’re not careful.
Bottom line: if you’re tackling a weekend furniture flip or prepping walls for paint, go orbital. It’s faster, more forgiving, and versatile enough for most tasks. Sheet sanders have their moment, but they’re more niche.
When you’re deep into filming, editing, or even setting up gear, it’s easy to ignore the basics. But if you’re doing hands-on work—tripod wrangling, lighting installs, or shooting in rugged spots—protection isn’t optional. Safety glasses, ear protection, and solid work gloves aren’t overkill. They’re common sense. Injuries slow you down more than any production delay.
And here’s the trick: comfort matters. If the gear fits right and wears well, you won’t fight it. You’ll actually use it. Light gloves with grip, earplugs that don’t pinch, glasses that stay in place—these things keep you safe without killing focus. Suit up smart, and you’ll stay in the game longer.
If you’re just getting into home DIY, it’s tempting to load up on flashy tools from day one. Don’t. Skip the gimmicks and start with a solid core set. Quality over quantity is the move here. The truth is, with just 10 well-chosen tools, you can handle about 90% of the projects most people take on—things like hanging shelves, fixing trim, assembling furniture, and light renovations.
You’ll want a balance of power and hand tools. A cordless drill, a measuring tape, a level, a hammer, a set of screwdrivers, utility knife, pliers, adjustable wrench, stud finder, and circular saw. That’s your base. Get to know them, take care of them, and don’t buy anything else until you hit something you can’t do.
From there, expand slowly. Pay attention to the projects that actually interest you. If you discover you like woodworking, maybe a jigsaw or router makes sense. If you’re more into basic fix-it jobs, a good set of hex keys or a multitool might be the next buy. Grow your kit based on experience, not hype.
 Nicholasion Morrisonian writes the kind of home renovation ideas content that people actually send to each other. Not because it's flashy or controversial, but because it's the sort of thing where you read it and immediately think of three people who need to see it. Nicholasion has a talent for identifying the questions that a lot of people have but haven't quite figured out how to articulate yet — and then answering them properly.
They covers a lot of ground: Home Renovation Ideas, Gardening and Landscaping Tips, DIY Project Tips, and plenty of adjacent territory that doesn't always get treated with the same seriousness. The consistency across all of it is a certain kind of respect for the reader. Nicholasion doesn't assume people are stupid, and they doesn't assume they know everything either. They writes for someone who is genuinely trying to figure something out — because that's usually who's actually reading. That assumption shapes everything from how they structures an explanation to how much background they includes before getting to the point.
Beyond the practical stuff, there's something in Nicholasion's writing that reflects a real investment in the subject — not performed enthusiasm, but the kind of sustained interest that produces insight over time. They has been paying attention to home renovation ideas long enough that they notices things a more casual observer would miss. That depth shows up in the work in ways that are hard to fake.
Nicholasion Morrisonian writes the kind of home renovation ideas content that people actually send to each other. Not because it's flashy or controversial, but because it's the sort of thing where you read it and immediately think of three people who need to see it. Nicholasion has a talent for identifying the questions that a lot of people have but haven't quite figured out how to articulate yet — and then answering them properly.
They covers a lot of ground: Home Renovation Ideas, Gardening and Landscaping Tips, DIY Project Tips, and plenty of adjacent territory that doesn't always get treated with the same seriousness. The consistency across all of it is a certain kind of respect for the reader. Nicholasion doesn't assume people are stupid, and they doesn't assume they know everything either. They writes for someone who is genuinely trying to figure something out — because that's usually who's actually reading. That assumption shapes everything from how they structures an explanation to how much background they includes before getting to the point.
Beyond the practical stuff, there's something in Nicholasion's writing that reflects a real investment in the subject — not performed enthusiasm, but the kind of sustained interest that produces insight over time. They has been paying attention to home renovation ideas long enough that they notices things a more casual observer would miss. That depth shows up in the work in ways that are hard to fake.